In the realm of electrical systems, the non-functioning electrical outlet stands as a common yet perplexing issue that can disrupt the seamless flow of daily life in both homes and businesses.
A functional electrical system is the backbone of modern living, ensuring not just convenience but also the safety of our spaces. In this article, we will delve into the intricacies of non-working outlets, emphasizing the pivotal role they play in maintaining the vitality of our living and working environments.
Join us in unraveling the causes and solutions to this common problem, recognizing the urgency of addressing these issues promptly for the safety and convenience of all.
Unveiling the Culprits: Why Is Your Outlet Inactive?
In the intricate landscape of electrical systems, understanding the root causes behind a non-working outlet is crucial for effective troubleshooting. Let’s delve into the main culprits, unraveling the complexities with industry terminology that sheds light on the intricate workings of electrical networks.
- Overloading Woes:
-
- The term “overloading” refers to the excessive demand placed on an electrical circuit, surpassing its designed capacity. This overload can lead to overheating, tripping circuit breakers, and rendering outlets inactive.
- Short Circuits:
-
- A “short circuit” occurs when the hot and neutral wires in an electrical circuit come into direct contact, creating a low-resistance path. This can lead to a sudden surge in current, tripping breakers and causing outlets to cease functioning.
- Faulty Wiring:
-
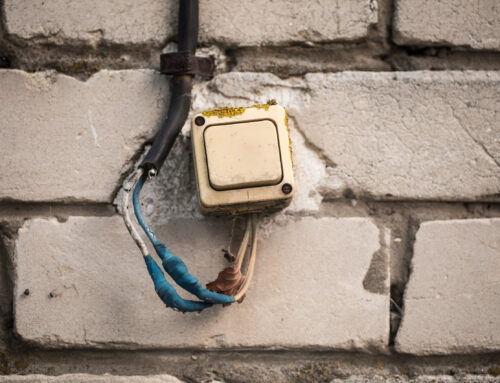
- Faulty or damaged wiring within the outlet or the broader electrical system can disrupt the flow of electricity, resulting in an inactive outlet. Identifying and addressing these issues is crucial for restoring functionality.
- Burnt Out Outlet Components:
-
- Continuous usage or overheating can cause the internal components of an outlet to burn out. Recognizing signs of burnt components is key to understanding why an outlet has become inactive.
- Loose Connections:
-
- Over time, the connections within an outlet or the electrical box may become loose. This can lead to intermittent power loss or a complete shutdown of the outlet.
By navigating through these industry terms and concepts, we aim to empower you with the knowledge needed to identify the specific culprit behind your non-working outlet and guide you towards effective solutions.
Empowering Homeowners: DIY Troubleshooting Steps
When faced with a non-working electrical outlet, homeowners can take proactive steps to identify and resolve common issues. Follow these step-by-step DIY troubleshooting guidelines to regain power and restore functionality to your outlets:
- Safety First: Prioritize safety by turning off the power at the circuit breaker before attempting any DIY troubleshooting.
- Check Circuit Breaker: Identify and reset the tripped circuit breaker corresponding to the affected area.
- Test with a Device: Plug a lamp or small appliance into the non-working outlet to determine if the issue is with the outlet or the connected device.
- Inspect for Damage: Examine the outlet for burnt smells, scorch marks, or loose connections. Consult a professional if any issues are detected.
- DIY or Professional Assistance: Depending on the findings, either replace the outlet following safety guidelines or seek professional help if the problem persists or seems complex.
Checking Circuit Breakers
When dealing with a non-working electrical outlet, a common culprit is a tripped circuit breaker. Follow these steps to inspect and reset circuit breakers, restoring power to your outlets:
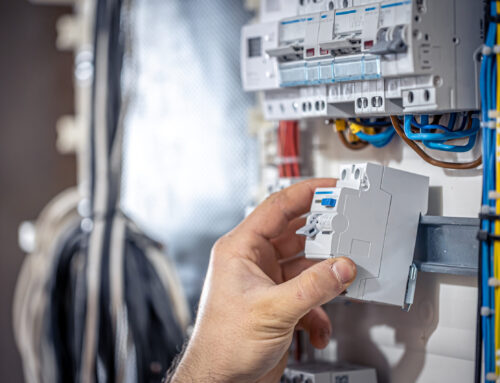
- Locate Electrical Panel: Identify the electrical panel or fuse box in your home or business where circuit breakers are housed.
- Identify and Turn Off Tripped Breaker: Visually locate any breakers in the “off” position, turn them off fully, and ensure they are in the correct position for a reset.
- Reset the Breaker: Switch the tripped breaker back to the fully “on” position, feeling resistance during the process.
- Observe and Test: Confirm the breaker stays in the “on” position and test the affected outlet with a device to verify power restoration.
- Check GFCI Outlets: If issues persist, inspect and reset Ground Fault Circuit Interrupters (GFCIs) that may be connected to the affected outlets.
Inspecting for Faulty Wiring
When confronted with a non-working electrical outlet, a potential culprit could be faulty or damaged wiring. Here’s a safe and systematic guide to help you navigate through the process of inspecting for faulty wiring:
- Prioritize Safety: Always turn off the power at the circuit breaker before inspecting for faulty wiring to ensure a safe assessment.
- Carefully Remove Outlet Cover: Use a screwdriver to safely remove the outlet cover and visually inspect for any visible damage or loose wires.
- Inspect Wiring Connections: Examine the wiring connections within the outlet box, looking for signs of fraying, damage, or loose connections.
- Use Voltage Tester (if comfortable): For those familiar with electrical tools, use a voltage tester to check for power flow. Adhere to safety guidelines during this process.
- Seek Professional Assistance if Unsure: If uncertain or if any damage is detected, consult with a licensed electrician for a thorough and secure assessment of the faulty wiring.
Testing Outlets with a Multimeter
When troubleshooting non-working electrical outlets, a multimeter can be a valuable tool for assessing electrical flow. Here’s a step-by-step guide on how to use a multimeter effectively:
- Select Voltage Setting: Set the multimeter to measure AC voltage, choosing an appropriate range for accurate readings.
- Probe Insertion: Insert the black probe into the common (COM) port and the red probe into the voltage (V) port on the multimeter.
- Safe Probing: Ensure dry conditions, turn on the outlet’s power, and gently touch the probes to the hot and neutral openings, avoiding obstruction.
- Read and Interpret Voltage: Read the multimeter for voltage readings within the expected range, typically 110-120 volts. Check for consistency in multiple outlets.
- Grounding Check and Professional Consultation: Verify grounding by testing the ground hole and consult a licensed electrician if multimeter readings indicate irregularities or if you are unsure about interpreting the results.
Knowing When to Seek Expert Help
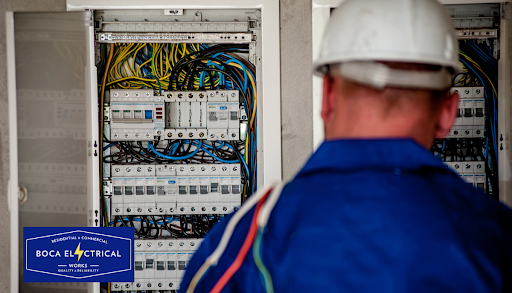
While DIY troubleshooting is empowering, recognizing when to enlist professional assistance is pivotal for addressing complex electrical problems. Here’s a discussion to guide you through situations where seeking expert help is not just advisable but necessary:
- Persistent Issues After DIY Efforts: If the non-working outlet persists despite DIY troubleshooting, it’s a clear signal that professional help is necessary.
- Repeated Circuit Breaker Tripping: Repeated tripping of circuit breakers associated with the outlet indicates potential wiring or circuitry issues requiring professional assessment.
- Visible Signs of Damage: Immediate professional assistance is crucial if there are visible signs of damage, such as burnt outlets, melted wires, or unusual odors.
- Multiple Non-Functional Outlets: When several outlets or electrical components are affected, it suggests a broader issue that necessitates a professional’s expertise.
- Safety Concerns and Lack of Expertise: Seek professional help if safety concerns arise during troubleshooting, such as sparking outlets or persistent shocks, and if you lack expertise in electrical systems.
Signs of Complex Electrical Issues
Identifying warning signs of complex electrical issues is crucial for homeowners to recognize when professional intervention is necessary. Here’s a guide outlining indicators that go beyond simple troubleshooting and may point to deeper electrical complexities:
- Flickering or Dimming Lights: Inconsistent lighting, especially affecting multiple fixtures, may signal deeper electrical issues.
- Burning Odors or Smoky Outlets: The presence of burning odors or smoke from outlets indicates a serious problem requiring immediate professional attention.
- Warm Outlets or Switches: Outlets feeling warm to the touch suggests overloading or faulty wiring, posing a fire risk and requiring professional assessment.
- Sparks or Electrical Arcing: Visible sparks or electrical arcing during outlet or switch usage signifies a severe electrical problem, necessitating expert evaluation.
- Frequent Breaker Tripping: Circuit breakers tripping frequently without an apparent cause indicates an underlying issue with the electrical system, requiring professional diagnosis.
The Role of a Licensed Electrician
When faced with intricate electrical issues, the importance of engaging a licensed electrician cannot be overstated. Here’s a discussion highlighting the significant value that qualified professionals bring to the resolution of complex electrical challenges:
- Comprehensive Expertise: Licensed electricians possess extensive knowledge and training for understanding, diagnosing, and resolving intricate electrical issues.
- Adherence to Safety Standards: Professionals prioritize safety, following industry protocols to minimize the risk of accidents or hazards during electrical work.
- Efficient Problem Resolution: Licensed electricians efficiently address complex issues, utilizing their experience and specialized tools to minimize downtime and inconvenience.
- Code Compliance: Ensuring adherence to local building codes and regulations, licensed electricians guarantee that repairs or installations meet necessary standards.
- Peace of Mind for Homeowners: Hiring a licensed electrician instills confidence, providing homeowners with peace of mind regarding the reliability and safety of the electrical system.
Ensuring Safety Throughout the Troubleshooting Process
When dealing with electrical issues, prioritizing safety is paramount. Here’s a guide highlighting essential safety precautions to observe throughout the troubleshooting process:
- Power Off Before Inspection: Always turn off the power at the circuit breaker before working on electrical outlets to prevent electric shocks.
- Use Insulated Tools: Employ insulated tools in good condition to minimize the risk of electrical contact.
- One Hand Rule: Adhere to the one hand rule when working with live circuits to minimize the risk of electric current passing through your body.
- Inspect Wiring Safely: Use a non-contact voltage tester before inspecting wiring and consult a professional if in doubt.
- Professional Consultation: Seek professional assistance if unsure or uncomfortable with any aspect of the troubleshooting process to ensure safety and prevent potential hazards.
Safety Gear and Practices
Ensuring safety during electrical work involves the use of appropriate gear and adherence to crucial practices. Here’s a comprehensive list of safety gear and practices to prevent accidents:
Safety Gear:
- Insulated Gloves: Wear insulated gloves to protect hands from electric shocks when handling electrical components.
- Safety Goggles: Use safety goggles to shield the eyes from potential sparks, debris, or other hazards during electrical work.
- Insulated Boots: Insulated boots provide an additional layer of protection against electrical shocks and prevent direct contact with the ground.
- Non-Conductive Headgear: For added protection, consider wearing non-conductive headgear, such as a hard hat, to reduce the risk of head injuries.
- Protective Clothing: Wear non-conductive and flame-resistant clothing to reduce the risk of burns and other injuries.
- Non-Conductive Mats: Place non-conductive mats on the floor in the workspace to create a barrier between the individual and any potential electric currents.
Safety Practices:
- Power Off Before Inspection: Always turn off the power at the circuit breaker before inspecting or working on electrical outlets.
- Test Equipment Before Use: Prior to use, ensure that all testing equipment, such as multimeters, is in proper working condition. Test on a known live circuit for accuracy.
- One Hand Rule: When working with live circuits, adhere to the one hand rule to minimize the risk of electric shock.
- Dry Conditions: Work in dry conditions to avoid electric shock. Avoid handling electrical components or tools with wet hands.
- Well-Ventilated Workspace: Ensure proper ventilation in the workspace to prevent the buildup of fumes or gases that may be released during electrical work.
- Emergency Procedures: Familiarize yourself with emergency procedures, including the location of fire extinguishers and how to shut off power in case of an emergency.
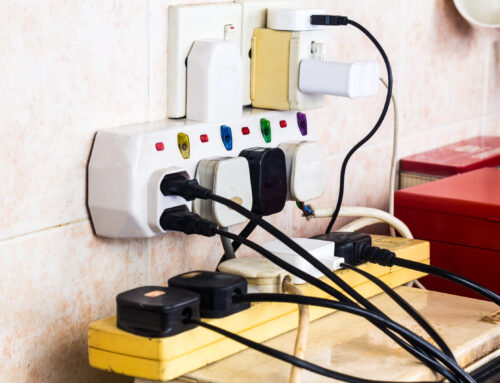
- Avoid Overloading Circuits: Distribute electrical loads evenly to prevent overloading circuits. Avoid connecting multiple high-powered devices to a single outlet.
- Keep Flammable Materials Away: Keep flammable materials away from the workspace to prevent the risk of fire.
- Professional Consultation: If unsure or uncomfortable with any aspect of the electrical work, seek professional assistance to ensure safety and prevent potential hazards.
Key Takeaway
Taking swift action, including a strategic blend of DIY troubleshooting and professional intervention, is essential to restore power to non-working electrical outlets. This approach not only ensures the immediate functionality of your electrical system but also prioritizes safety, providing a comprehensive solution to address complex issues.
People Also Ask
In this section, we will address common questions (FAQs) surrounding electrical outlet issues, providing concise and insightful answers to empower you in troubleshooting and ensuring the safety and functionality of your electrical system.
Why is my electrical outlet not working?
Non-working electrical outlets may be due to various reasons, including tripped circuit breakers, faulty wiring, or damaged outlets. DIY troubleshooting or professional assistance can help identify and address the issue.
Can overloading damage my electrical outlets?
Yes, overloading electrical outlets can lead to damage. It puts stress on the wiring and may cause overheating, potentially leading to burnt outlets or electrical fires. Distributing electrical loads evenly and avoiding excessive use of power strips can prevent overloading.
How do I check for faulty wiring in my home?
To check for faulty wiring, inspect outlets for visible damage, use a voltage tester to identify live wires, and examine the electrical panel for tripped breakers. However, if uncertain or uncomfortable, it’s advisable to consult with a professional electrician for a thorough assessment.
When should I call a professional electrician for outlet issues?
It’s advisable to call a professional electrician when DIY troubleshooting doesn’t resolve the issue, there are visible signs of damage, or if you lack electrical knowledge. Additionally, persistent problems, repeated breaker tripping, or multiple affected outlets may indicate a need for expert intervention.
What safety measures should I follow when troubleshooting electrical outlets?
Prioritize safety by turning off power at the circuit breaker, using insulated tools, wearing appropriate safety gear, and testing equipment before use. Follow the one hand rule when working with live circuits, work in dry conditions, and consult emergency procedures if needed. If in doubt, seek professional assistance to ensure a secure troubleshooting process.
Illuminate Your Space with Expertise: Trusted Electrical Solutions from Bocaelectrical
For expert electrical solutions tailored to your needs, trust Bocaelectrical. Our mission is to provide reliable, safe, and efficient electrical services to enhance your home or business. Contact us today for a consultation and let us illuminate your space with quality and professionalism!


